How to connect Actility ThingPark sensors to Infodeck
Use this guide to send readings from sensors on Actility ThingPark into Infodeck. Your sensors remain on their existing network; ThingPark forwards their readings to Infodeck through an HTTP connection.
Quick summary: Create an Infodeck connector, register the sensors with the correct Asset Type and DevEUI, configure ThingPark to forward their readings, then check the results in each asset.
Before you begin
You need:
- Permission to view and manage integrations, register assets and use the relevant locations and Asset Types in your Infodeck workspace.
- Access to manage connections and device routing in your ThingPark account.
- A sensor already registered on ThingPark, its DevEUI, and a working network connection.
- An Infodeck Asset Type with the correct decoder and measurement fields for that sensor model and message format. If you are unsure which type to use, ask your administrator or Infodeck Support before registering the fleet.
This guide covers ThingPark X IoT Flow → HTTP. Menus vary between ThingPark Enterprise and ThingPark Wireless. Wireless accounts may also need their connectivity plan and device association configured for IoT Flow; see Actility's device association guide.
ThingPark does not automatically copy its device list into Infodeck. Register or import each sensor in Infodeck and associate it with the matching Asset Type. Start with one sensor before adding the rest.
1. Create the connector in Infodeck
- Open Settings → Integrations.
- Click Add connector, select IoT networks, then choose Actility ThingPark.
- Enter a Connector name, such as
Building sensors. Add a Description if helpful. - Click Create and continue.
The connector includes a Connect ThingPark sensors checklist. You can return to it at any time.
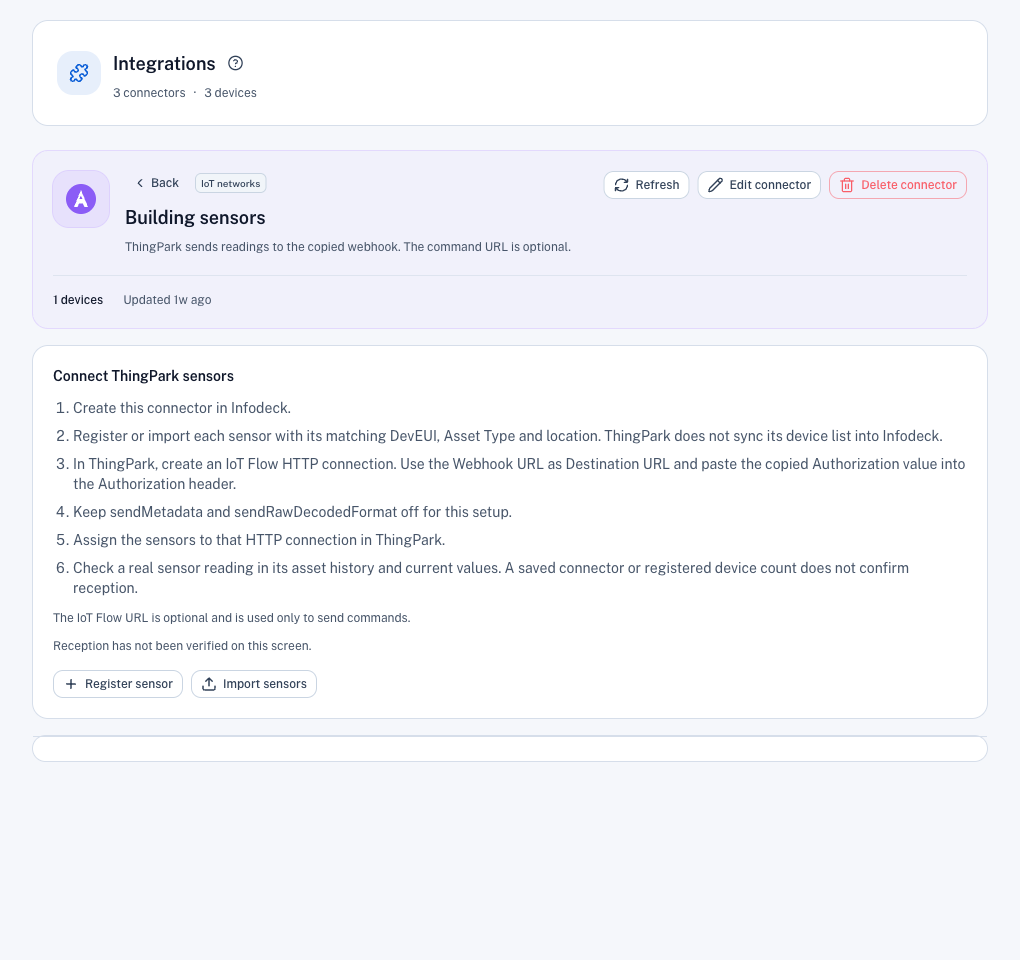
Screenshots use demonstration names. Identifying details and connection values are hidden.
2. Copy the connection details
- If the editor is not already open, open the connector and click Edit connector.
- Under Provider webhook, use Copy webhook URL and Copy authorization when filling in the ThingPark connection in step 4.
- Leave IoT Flow command URL (optional) empty if you only need to receive readings.
Keep the copied Authorization value confidential. Copy it directly into ThingPark rather than sharing it in messages or screenshots. Use the complete copied value without adding another prefix.
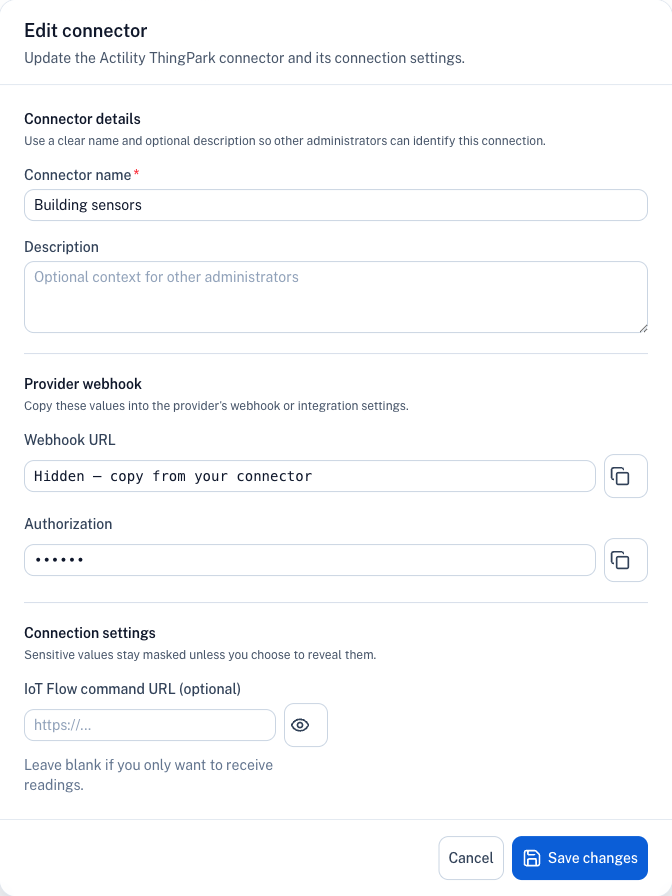
The webhook receives readings from ThingPark. The optional command URL is for sending commands in the other direction; it is not the destination for incoming readings.
3. Register your first sensor
- From the connector's checklist, click Register sensor.
- Select the correct Asset Type for the model and message format.
- Enter an Asset Name, such as
Meeting room sensor. - Confirm that Integration Service is your ThingPark connector.
- In Device EUI (DevEUI), enter the sensor's 16 hexadecimal characters exactly as shown in ThingPark. Keep leading zeros; Infodeck accepts uppercase or lowercase letters. Do not enter an AppEUI or a device activation key.
- Select the sensor's Location and click Register Asset.
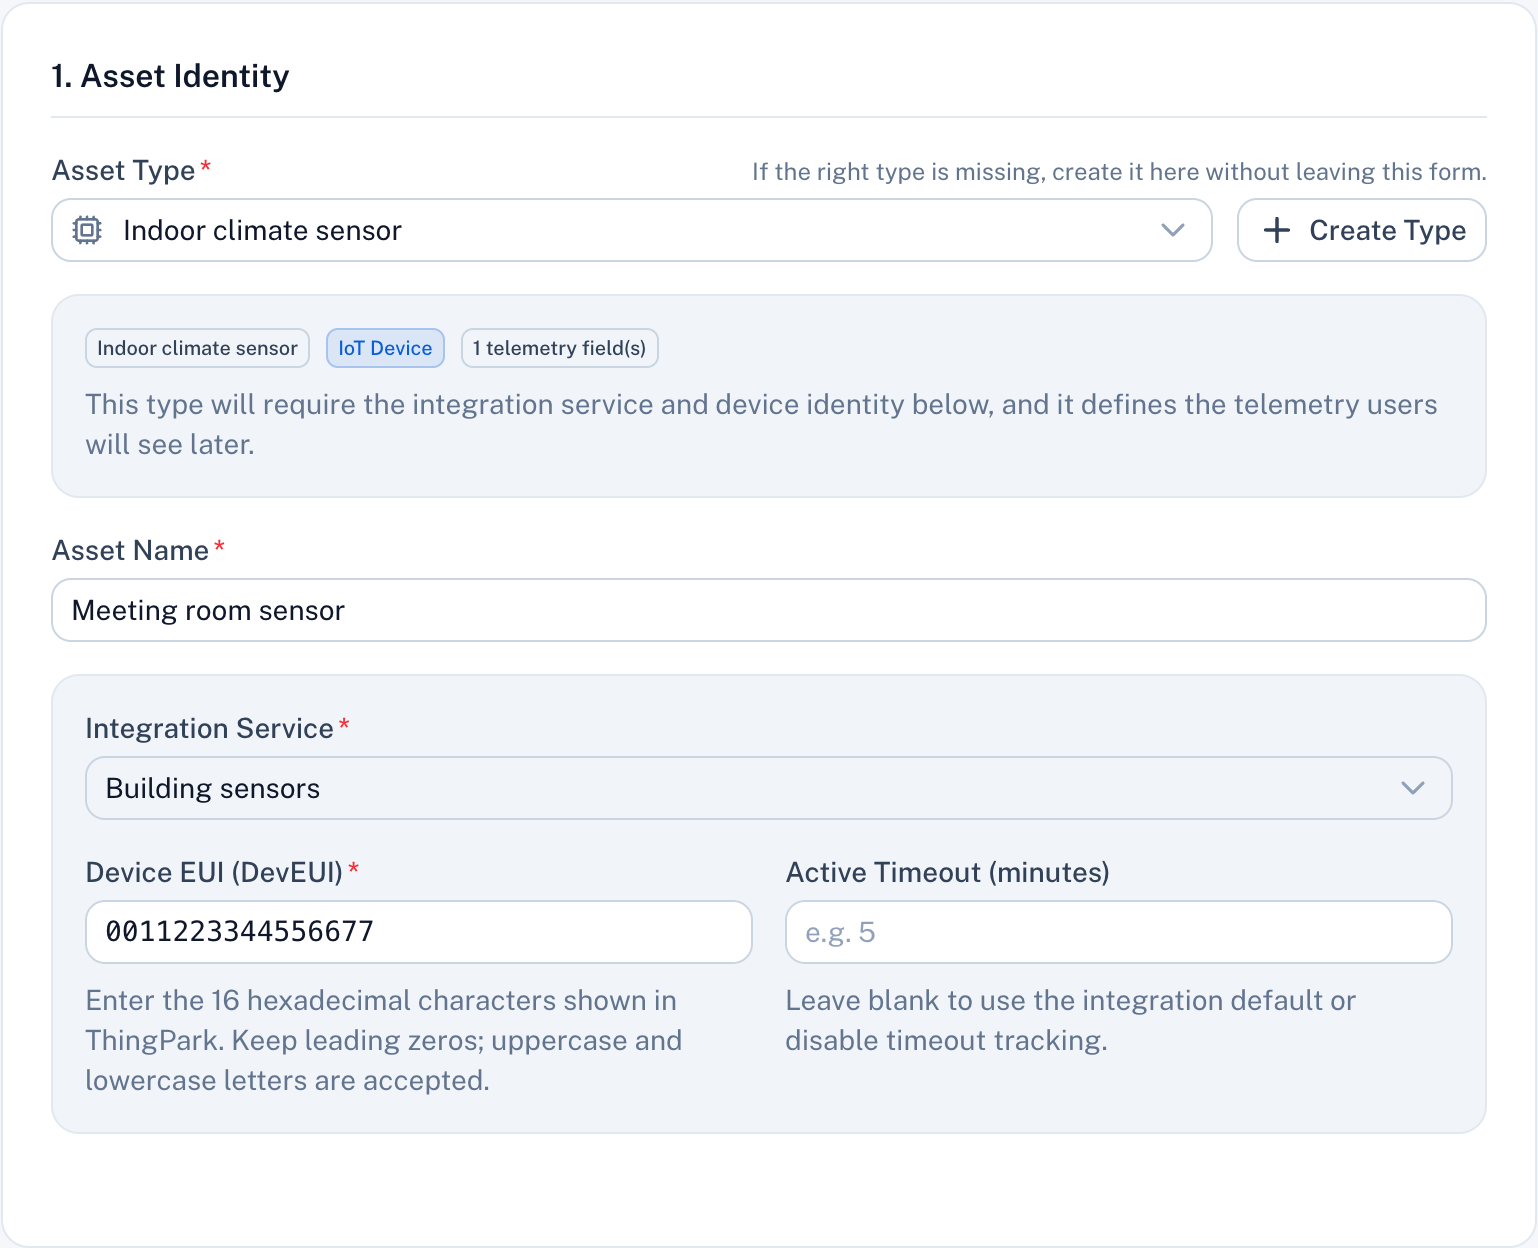
For a larger group, use Import sensors and download the current template. Check each row's Asset Type, connector and DevEUI before importing. Registering assets does not change their ThingPark radio configuration.
The connector receives the message. The Asset Type's decoder turns that message into measurements, such as temperature, humidity or carbon dioxide. A connection can be working while the wrong decoder produces no useful values.
Sensor field reference
| Field | Required | What to choose |
|---|---|---|
| Asset Type | Yes | The type with the decoder and measurement fields for your sensor model. |
| Asset Name | Yes | A recognizable name for the individual sensor. |
| Integration Service | Yes | The ThingPark connector that receives this device's messages. |
| Device EUI (DevEUI) | Yes | The matching 16-character hexadecimal identifier from ThingPark. |
| Location | Yes | Where the sensor is installed. |
| Active Timeout (minutes) | No | The expected reporting interval allowance, if used by your installation. Leaving it blank uses the integration default or disables timeout tracking. |
4. Configure the HTTP connection in ThingPark
- In ThingPark, open Connections and choose Create or Add connection. Select ThingPark X IoT Flow, then HTTP.
- Give the connection a recognizable name.
- Set Destination URL to the Webhook URL copied from Infodeck.
- Under Headers, add
Authorizationwith the complete value copied from Infodeck. - Keep
sendMetadataand Send Raw Decoded Format (sendRawDecodedFormat) off for this setup. - Click Create.
Actility documents these screens in its HTTP connection guide and the format switches in its common connection parameters.
Ask your network administrator to confirm Strict Mode, retry and message-validity settings during commissioning. These settings affect rejected or delayed messages; a connection status alone does not prove that a reading was stored.
5. Assign the sensor to the connection
In ThingPark, open the sensor's device details, add the new HTTP connection/application and confirm the assignment. ThingPark Wireless installations may use IoT Flow associations or flows instead; follow the workflow for your account.
Keep any existing destinations that the sensor still needs. Check one sensor before changing routing for a larger group.
6. Confirm the first reading in Infodeck
- Wait for the sensor's next scheduled transmission, or use its normal test/transmit function.
- In Infodeck, open Assets and select the sensor.
- In IoT Status, check Last Uplink and confirm that its time corresponds to the new transmission.
- Check Reading history and the current measurement values. Confirm that the units and values make sense for the sensor.
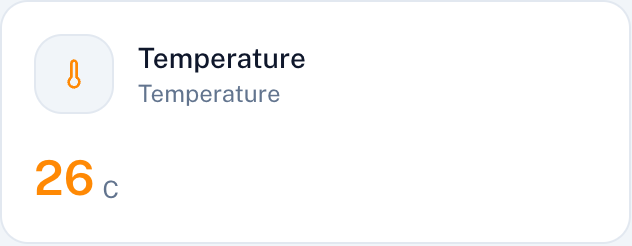
Example measurement display. Confirm the latest report time and history for your own sensor; the illustration is not a live connection indicator.
A saved connector, a device count or a successful ThingPark connection status is not enough. Finish this check with a real sensor reading before connecting the rest of the fleet.
Correct a mistake later
Open Settings → Integrations → your ThingPark connector → Edit connector. You can change its name, description or optional command URL, then click Save changes.
- Leaving an existing masked command URL blank keeps the stored value.
- Choose Clear stored command URL, then Save changes, to remove it. Keep stored command URL cancels that removal before saving.
- If the wrong Destination URL, Authorization header or device assignment was entered in ThingPark, correct it in the ThingPark console. Infodeck does not update those remote settings when you edit the connector. See Actility's connection editing instructions.
Troubleshooting
| What you see | What to check |
|---|---|
| The sensor is registered but has no readings | Check that it transmits in ThingPark and is assigned to the intended connection. Compare its DevEUI with the Infodeck asset. |
| ThingPark reports an authorization error | Copy the Authorization value again from the matching Infodeck connector and check the HTTP header in ThingPark. |
| Readings arrive but measurements are empty or wrong | Confirm the sensor model, Asset Type decoder, expected message format and measurement units. |
| The latest report time does not advance | Check a new physical transmission and the full routing path. A report or connection notification may not contain sensor measurements. |
| A DevEUI is rejected during registration or import | Use exactly 16 hexadecimal characters, with no spaces or separators, and preserve leading zeros. |
| The sensor can report but cannot receive commands | Receiving and commands have separate requirements. Ask Support to verify the command URL, device capabilities and configured actions. |
Example: a meeting room sensor
Create a connector named Building sensors. Register Meeting room sensor, select its matching sensor-model Asset Type and choose the room's location. Add the HTTP connection in ThingPark and assign that device. When its next reading arrives, compare the report time, temperature and other expected measurements in Infodeck before adding more rooms.
Related guides
Need help choosing a decoder or checking the first reading? Contact Infodeck Support.